TRUE HANDLELESS STYLE KITCHENS
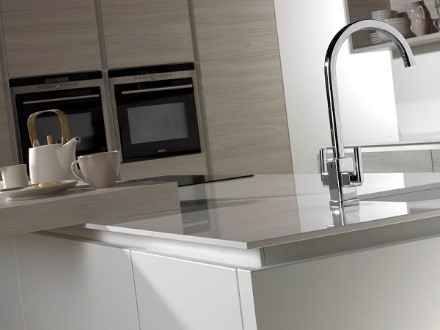
We are pleased to offer True Handleless German style kitchens. You will see from the images of these kitchens that the units feature a rail behind the doors which allows you to put your hand around the back of the door to open it.
The rails need to be cut to size and installed on site so your fitter will need to be happy with cutting and fitting these.
BASE UNITS
TOP RAIL
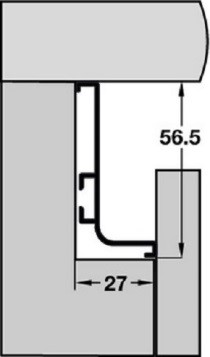
Under the worktop you will need to fit a top rail profile (see below). This will run across the length of the run of units. These come in lengths of 4.1m and can be cut to size (using a circular chop saw) to fit the necessary number of units.
Profile connectors are available to connect the rail profile to the cabinet and must be ordered separately. These are plastic clips that slide into the channel on the reverse of the trim. They fasten to the forked brackets that are secured to the gables of each cabinet.
The following diagram shows how a rail profile sits underneath a worktop.
For the end of a run of units, top rail trim caps are available to finish off the end of the rail. Where two runs meet a top rail connector for internal corners is used and there is also an external corner version.
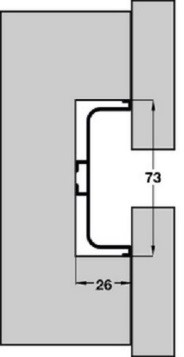
MID RAIL
Between a door and a drawer, or as in the following example, between 2 drawers, you will require a mid-rail profile. This allows you to open the drawer above and the door or drawer below. These come in lengths of 4.1m and can be cut to size (using a circular chop saw) to fit the necessary number of units.
For the end of a run of units, top rail trim caps are available to finish off the end of the rail. Where two runs meet a top rail connector for internal corners is used. There is no external corner option for the mid rail.
Profile connectors are available to connect the rail profile to the cabinet and must be ordered separately.
INTEGRATING APPLIANCES
Ovens – under counter ovens cannot be used with the top rail, so if you wish to use them you will need to stop the top rail either side of the appliance. The rail has to be ended either side of the oven and trim caps used.
If you are using a free standing appliance, you will need to put carcass panels both sides of the appliance and finish the rails against the panel.
For other appliances such as dishwashers, fridges and freezers, the rail can be continued across the front of the appliance but the appliance needs to be wound down on it legs to reduce the height. For this reason XL dishwashers are not suitable. You should always check the specification of all appliances to ensure that they will work before purchase.
WORKTOPS
Where you have a hob or sink you will need to make the worktop deeper than normal, for example you will need to order 650mm deep for that run in order to allow for material in front and behind the hob or sink. If you were to use a normal 600mm depth worktop the cut-out for the hob or sink can cut into the rail at the front of the unit.
WALL UNITS
For ease of construction and cost- saving, we construct our wall units in such a way that the door slightly overlaps the carcass at the bottom, which allows for the door to be opened. The units are therefore slightly shorter than the usual 720mm but are exactly the same as standard units in every respect.
TALL HOUSINGS
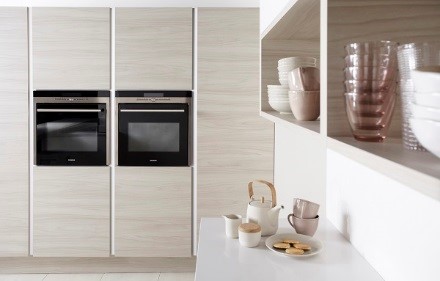
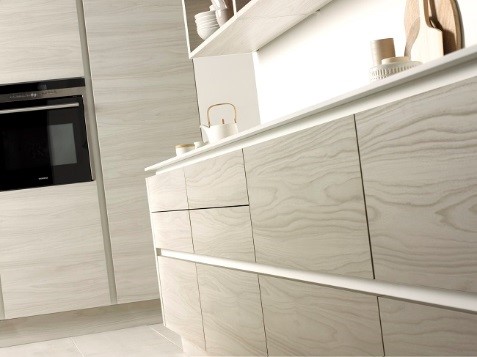
As you can see from the above picture the housings have to have a rail in-between them to allow for door opening.
- The standard vertical profile is used where you have an opening door on the side and don’t need to access a handle on the other side. It can also be used to end a run where an end panel or accessory is fitted.
- The intermediate vertical profile is used where two opening doors meet.
IMPORTANT – you need to allow 35mm between each vertical unit or vertical unit and panel to allow for the vertical trim. This requires a spacer which needs to be supplied by the fitter eg a block of wood for example. This needs to be taken into account when planning the kitchen.
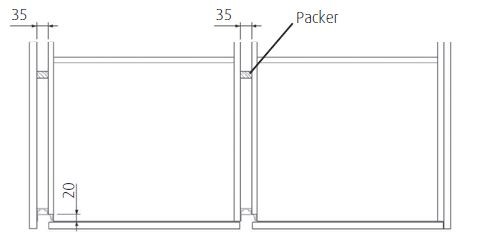
The trims sit over the front of the gables on these cabinets or can butt-up to the other unit or accessory where access to the door is not required. If you have an end post you need to take this into account when planning. For example, with a 50mm post and 18mm panel you will need to allow for a 66mm cabinet.
The trim has to be fixed to the cabinets using 4 x 60mm countersunk screws. The space is screw fixed to the cabinets from the inside of each cabinet. Note, try to position the screw holes in the cabinet so that they are concealed (such as behind hinge plates)
PANELS
Special panels are available for most ranges to carry on the handleless look. These can be used around the edges of units for example on islands and breakfast bars. Some ranges such as Otto offer mitred panels which create an almost seamless handleless look.